
Showing Up for Our Communities
Through Frontwave Give360, we support local organizations and causes that strengthen the communities we call home.
Through Frontwave Give360, we support local organizations and causes that strengthen the communities we call home.
Use the value you've built to renovate, consolidate, or fund what's next.
Lending options tailored for hardworking business owners like you.
Insights on money, life, and the communities we serve.
Turning compassion into action through grants, scholarships, and support for local nonprofits.
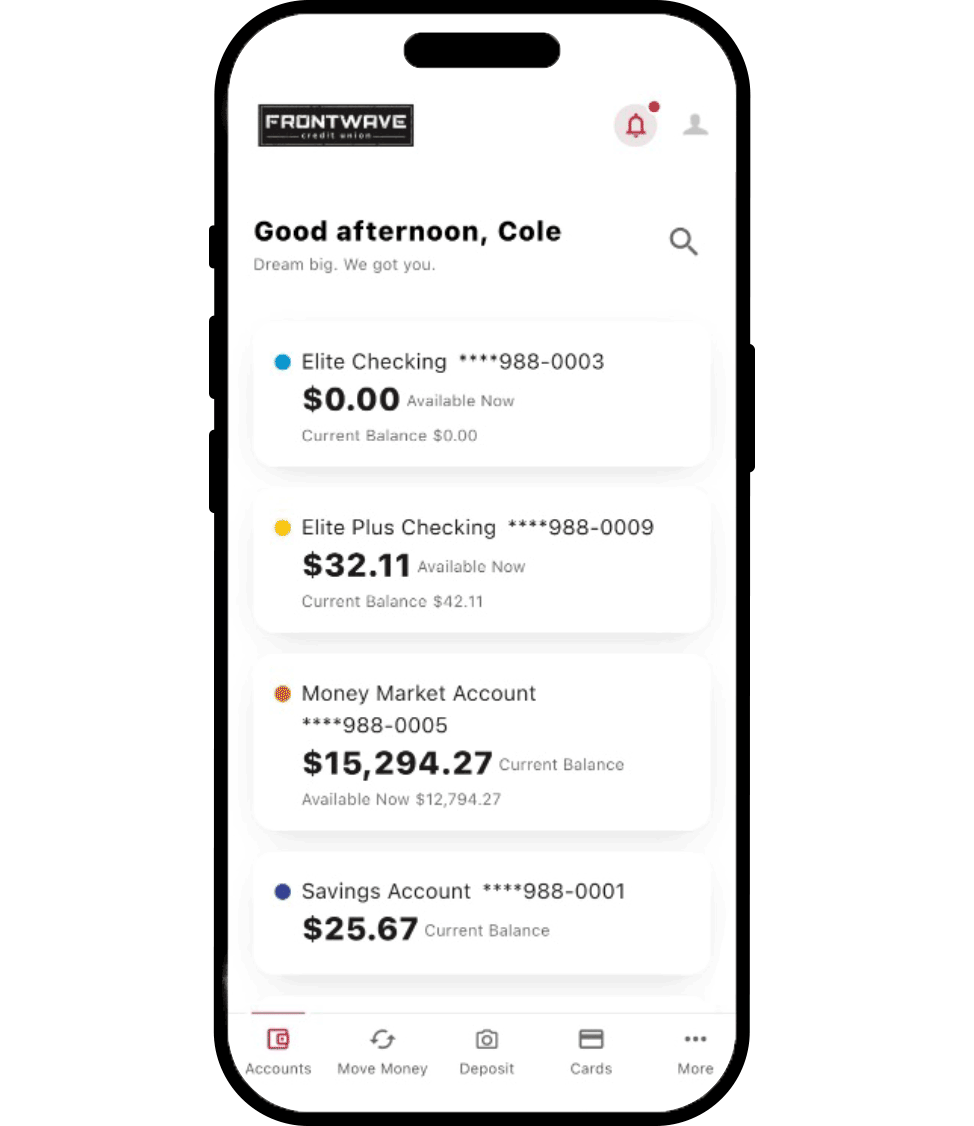
Our Bill Pay experience makes it easy to pay bills, manage due dates and stay organized. Pay companies and service providers directly from Digital Banking. No checks, no stamps, no missed due dates. Schedule one-time or recurring payments in one place.
Open a topic below to get step-by-step help.
On Desktop
On Mobile
Before you can make a payment, you’ll need to add a biller - someone you want to pay. This could be a company (like a utility provider) or a person (like your landlord or gardener). You will need the biller’s name and payment details. Having a recent bill or invoice nearby helps ensure your payment information is accurate.
Optional: Turn on eBills
If your biller supports it, you may see an option to turn on eBills - electronic statements that appear right in Bill Pay. Instead of logging into multiple websites or sorting through emails, your latest bill will be delivered straight to your Payment Center.
You’ll be able to:
You'll see the option to enroll in eBills when viewing your biller’s details. Not all billers offer eBills.
Once your biller is added, you can make a payment in just a few quick steps. Whether you’re on desktop or mobile, the process is nearly the same.
To Make a Payment:
On desktop, you can pay multiple bills at once. Just enter amounts and due dates for each biller, then click Send Payments to submit them all together.
What Happens Next
After you submit the payment, you’ll see a confirmation screen where you can:
Note: Payments in process can’t be changed or canceled. To view or track a payment, go to the Activity tab.
Want to set it and forget it? AutoPay handles recurring payments so you don’t have to log in every time a bill is due.
You can choose a fixed amount or (if available) pay just the amount due, and you’ll always see the details before confirming.
To set up AutoPay:
If your biller supports it, you can get a reminder before each AutoPay goes through.
Don’t want to miss a due date? You can set a reminder for any biller that doesn’t already have AutoPay or eBills. It gives you a heads-up before your bill is due, but it doesn’t make the payment.
To set a reminder:
Reminders are sent via email or app notification, based on your preferences.
Want to check the status of a payment or review your billing history? You’ll find it all in the Activity section of Bill Pay.
In the Activity section, you can:
Scheduled means the payment is set but hasn’t started. Processing means it’s on the way. Completed means it’s delivered.
Level Up with Our Mobile App
Internet Explorer is no longer supported by Microsoft. Please update to Microsoft's latest browser Microsoft Edge. Please note that even Microsoft's website cannot well-support this browser. Navigating to the link in this message will result in you being directed to a "Download Microsoft Edge" page with license terms and an "Accept and download" button.
You are leaving the Frontwave Credit Union website. External third-party web sites will be presented in a new and separate content window. Frontwave Credit Union does not provide, and is not responsible for, the product, service, overall website content, accessibility, security or privacy policies on any external third-party sites.